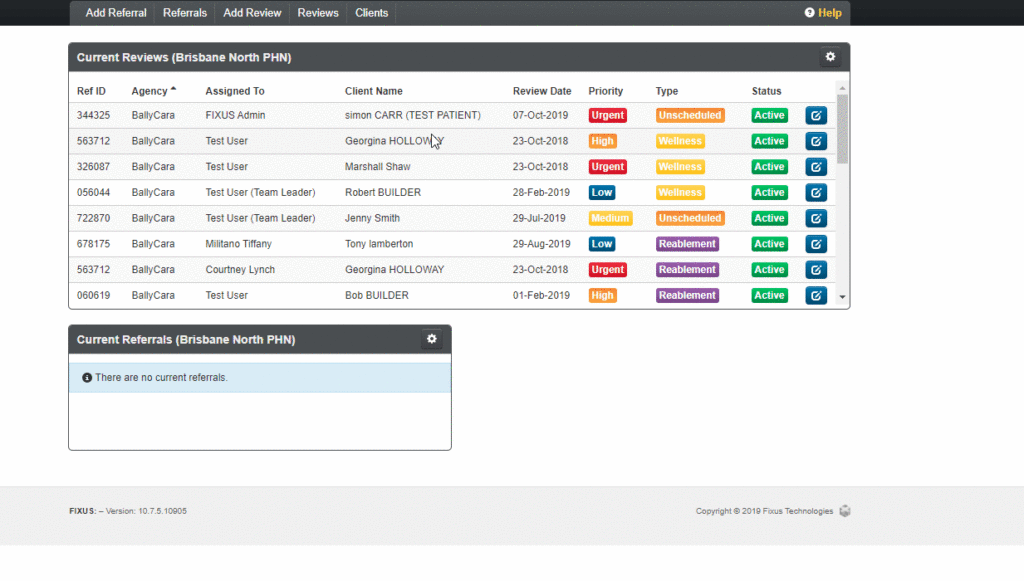
This guide will show you step by step how to Update a Review in the RAS module. We have even made it easier by including short videos to help.
Explanation of sections:
Update Review: Update the details of the review.
Assigned Team: Agencies team to be assigned to referral.
Review status: Update the details of the review status.
Updating a Review
- Locate the Reviews option in the sub menu and select.
- Search for the review your wish to update then select the View button.
- Locate the Details tab in the left-hand menu and click on it to access Current Review Details.
- Clicking on the Update button will display a window to Update Review Details, which you can update the Review Date & Review Priority fields.
- Click Save to save your changes.

Change Assigned Team
- Locate the Reviews option in the sub menu and select.
- Search for the review you wish to update and select the View button.
- Locate the Details tab in the left-hand menu and click on it to access Current Review Details.
- Click on Change Assigned Team – you will be presented with an Assigned Team screen.
- Click the Search button.
- From the Team selection window, select the Assign button on the team you wish to assign to.
- Select Reason for the Manual Selection from the drop-down list.
- If required, enter comments into the Manual Selection Comments field.
- Optional – you can assign an agency staff member to this review, select the Staff member from the drop-down list.
- Click Save to save your changes.

Change Review Status
- Locate the Reviews option in the sub menu and select.
- Search for the review your wish to update and select View button the review you wish to update the details for.
- Locate the Details tab in the left-hand menu and click on it to access Current Review details.
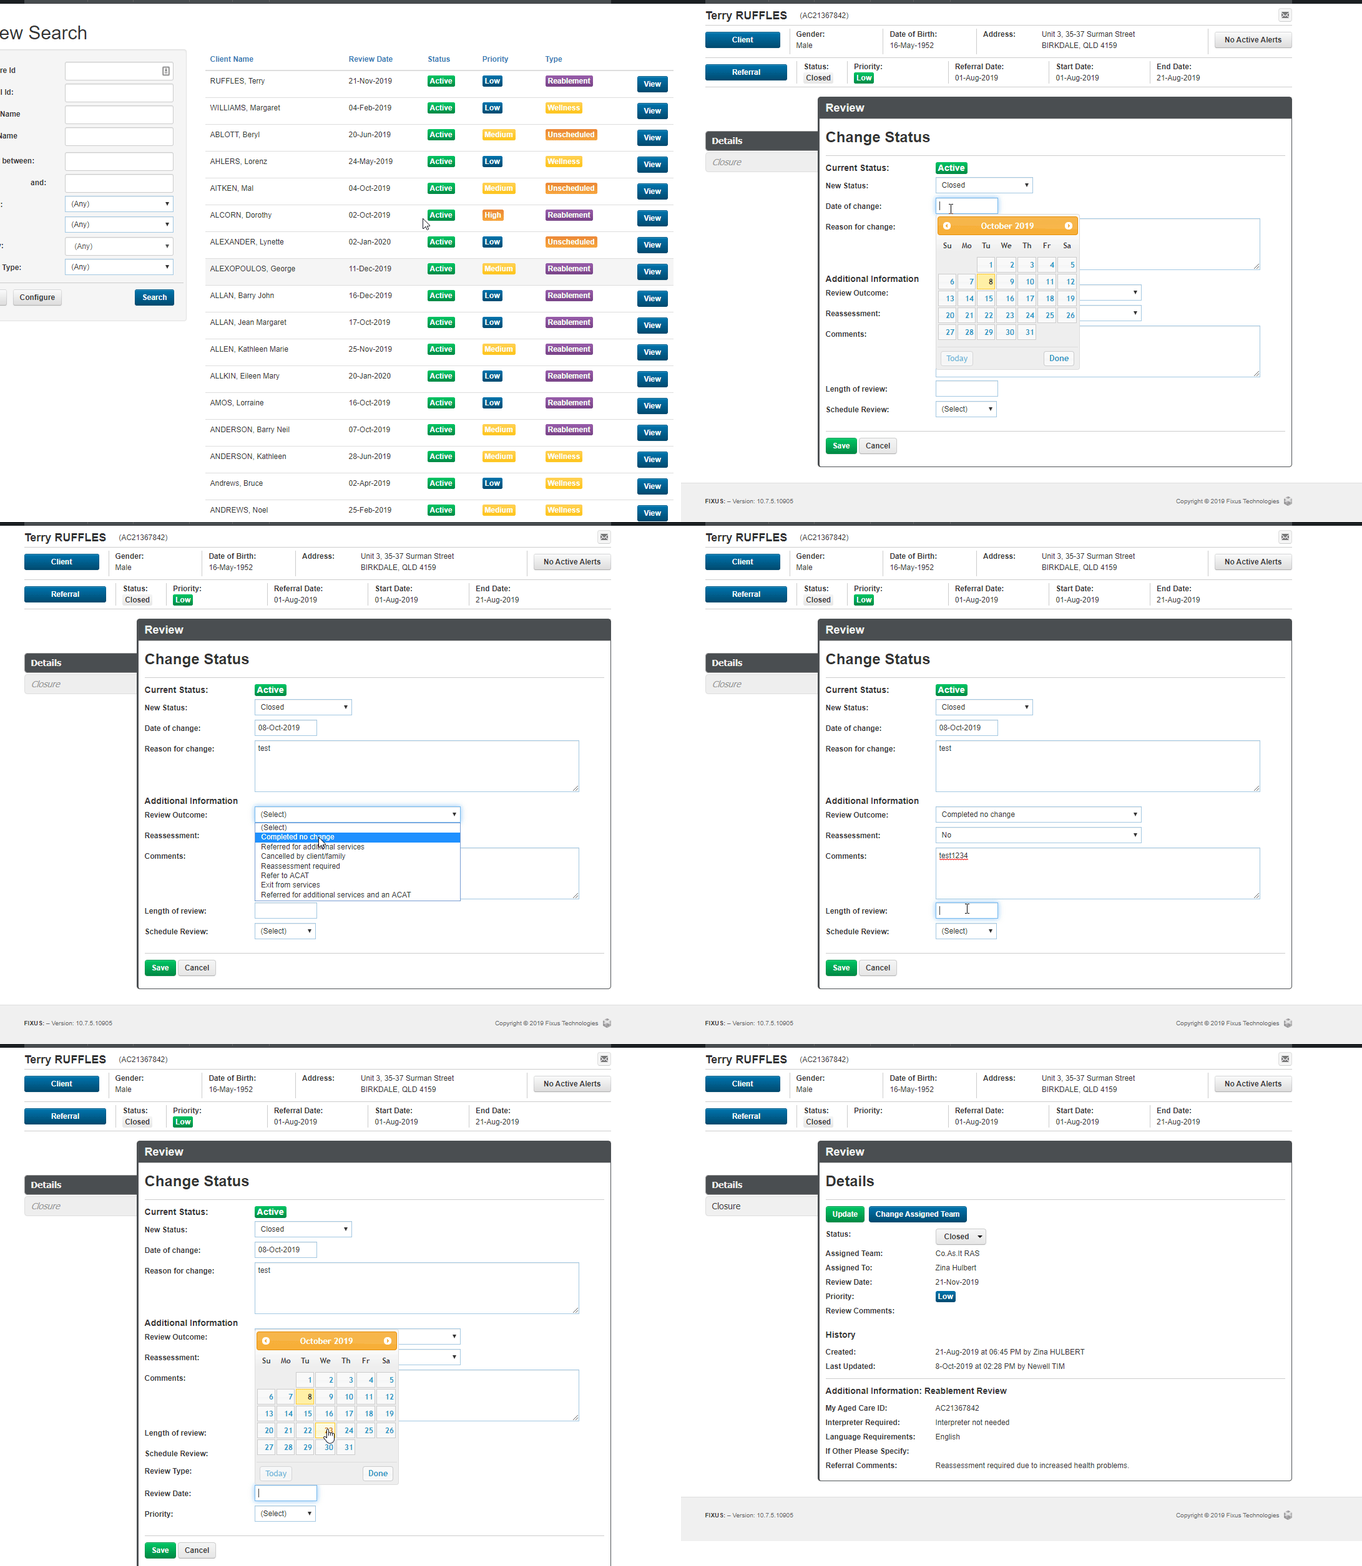
- Select the Status drop-down and click Change status.
- You will be presented with the Change Status screen.
- Select New Status from the New Status drop-down list.
- Enter a Date for the Date of Change field.
- Enter a Reason for Change if required.
*Note: if “Closed” is selected you will be prompted with the following fields: - Additional Information will be prompted when changing the status to closed.
- Enter a Review Outcome from the drop-down list.
- Select Option from the Reassessment drop-down list.
- Enter a Comment in the Comments field if required.
- Enter a Value into the Length of Review field.
- Select Option from the Schedule Review drop-down list.
*Note: if “Yes” is selected you will be prompted with the following fields: - Select Review Type from the drop-down list.
- Enter a Review Date.
- Select a Priority from the drop-down list.
- Click Save to Save your changes.

