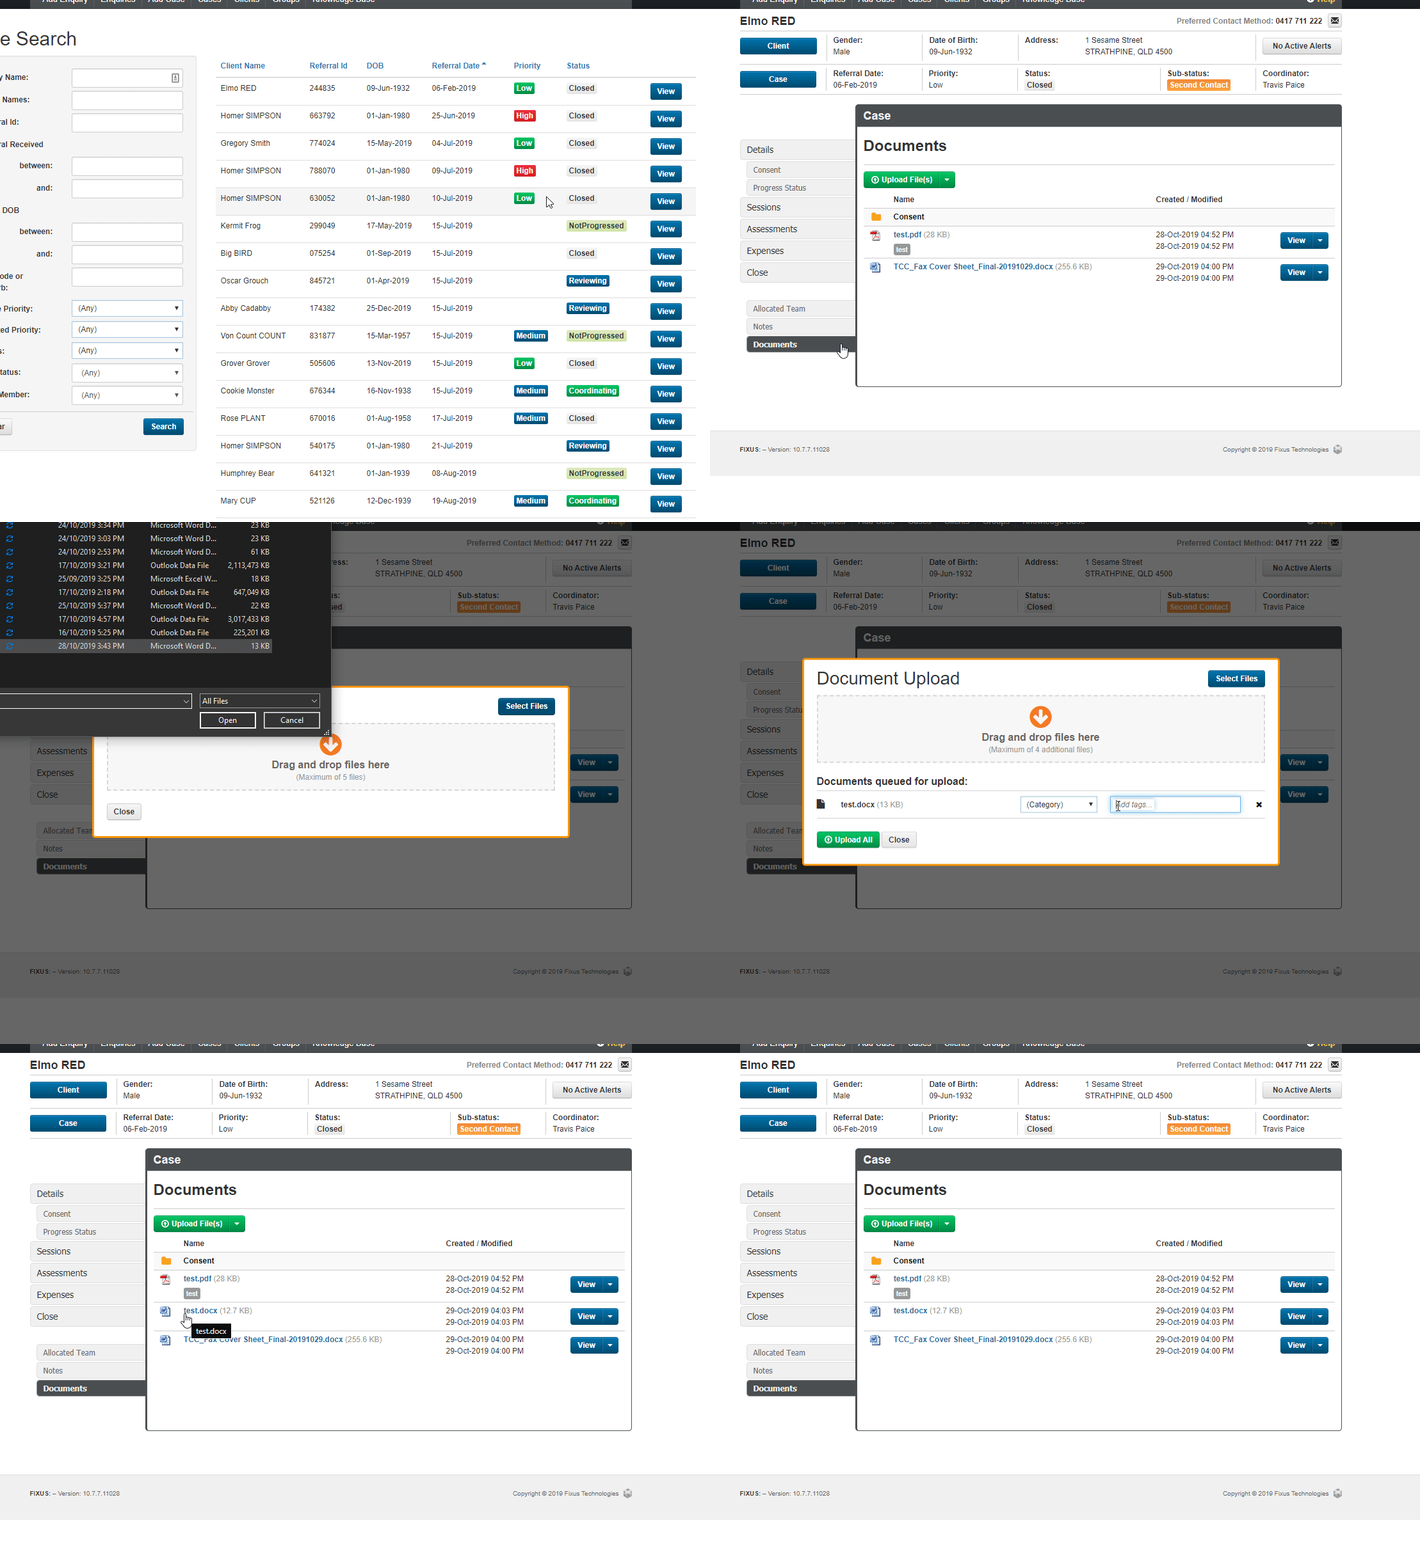
This guide will show you step by step how to Add Documents to a case in the NDIS Access Pathway module. We have even made it easier by including short videos to help.
Explanation of Sections:
Adding Documents: Attaching document(s) to a case.
Add from Template: Attaching document(s) to a case from a template.
Adding Documents
- Open the case you wish to add a document for.
- Locate the Documents tab in the left hand menu and click on it to view documents.
- Click Upload File to upload a document.
- You will be presented with the Document upload pop up window.
- You can drag and drop files into the Drag and Drop file here section or click Select Files button.
- * Note you can only drag a maximum of 5 files on each upload.
- Select a Category from the drop-down list.
- Add a tag for the file if required.
- Click Upload All to attach documents to the case.

Add from Template
- Open the case you wish to add a document to.
- Locate the Documents tab in the left-hand menu and click on it to view documents.
- Click the down arrow then click on the Add From Template.
- You will be presented with an Add From Template pop-up window, select a Category and Template then click next.
- Select a Recipient – if required you can change the filename and click Create.
- Your document has been created. You can now click on Edit Document button to edit the document.
- You will be presented with a browser pop up window confirming what program to open the Template with.

